Monday, April 20, 2009

T-shirt Tote: a How-to

Someone on swapbot sent me a reusable bag made out of a tshirt. At first I thought, "this isn't going to hold my stuff." but then I tried it and I was wrong.

So then I thought about making these for a fundraiser for Avery. I had already said I would make some reusable bags for the fundraiser, but I wasn't really looking forward to all the cutting and sewing. So I took a look at these bags and figured it looked easy enough so I gave it a shot.

Wow! It was pretty easy and quick too. My kind of project.

So over the weekend I scoured the a few thrift stores for some marked-down t-shirts. I think I ended up buying around 30. They ranged in price from 30¢ to 99¢. I'm cheap. That's the most I'll pay for a thrift store t-shirt. I even used the original bag to carry some of the loot home with me. so, yeah, these things do work.

I am actually considering taking a few to work and leaving them in the break room for earth day. Hoping to raise awareness about reusable goods to the folks that I work with. We'll see how that goes.


So, here's a quick run-down on how I am making them.

First, I think you should get tees that have funny imprints on them. I found one that says "Are you into foursomes?" with lady golfers. I thought it was funny. Anyway, when looking for tees, make sure that there are no holes and that the fabric is 100% cotton... or a blend is ok. but I wouldn't recommend any of those sheer tees. they may work, but I wouldn't want to try them.


Now that you have your tee...
I've been ironing my tees because I like a smooth fabric to work with. Its totally up to you how you do it.


Smooth out your tee then fold lengthwise and cut the neck and sleeves off.

I try to keep as much of the image on the shirt as I possibly can. But you need to keep in mind that you'll need a wide enough opening to put stuff into it.

After cutting you'll have what looks like a tank top.


Gather the bottom sides and fold inward about two inches and pin together. This should make a gusset or whatever its called. (I don't know any other way to describe it. maybe the picture will be better help?)


Time to sew.
Sew about three or four stitches along the bottom hem. I use the smallest stitch settings on my machine to do this.


Once you've got your bottom all stitched up take care of the straps(handles).
What I did was fold over each strap and sew the layers together to hopefully make it more durable. I used a zigzag stitch.


Voila! Now you have a reusable shopping bag!


Now go shopping!

Thursday, January 15, 2009

I saw, I conquered. Its a hat.

Sometimes I look at an item and think, "pshaw, anyone can do that" but other times I just look away as if I have no interest. the majority of those times, I secretly wish I could make that whatever it is. I've always wanted to try making a hat, but for some strange reason I thought they looked too complicated. So I just accepted that I would never make a hat... besides my head is too huge to put one on it.

So anyway, I came across an upcycling tutorial that uses an old sweater to make two winter hats. I looked at it and thought it looked easy enough. I could get a knitted hat without actually having to know how to knit. sweet.

So, being that I live in Houston where it hardly ever gets colder than the 50s, I don't own too many sweaters. I learned of this tutorial on Tuesday. Its been cold here this week... like in the freezing temps cold. so that means I'm wearing all the sweaters I own, this week. So I really couldn't cut into one of my existing sweaters - no matter how ugly and worn they may be.

I ended up taking a trip to one of the many thrift stores in my neighborhood. Luckily for me on the day that I went, they had a half off sale on pink tagged items. I found a decent but really ugly sweater marked at $2.30. I hate that I didn't take a pic of the sweater in all its ugliness. It was the type that had knitted flowers on top of appliqued leaves with a cow like pattern on the front. One sleeve was black and one was white. The back of the sweater was plain white. I used that for my hat. oh, heehee the sweater even had :gasp: shoulder pads!!!! WTF?! hahaha


I wasn't able to follow the tutorial to the letter. I was lazy. I'm always lazy.
I tried to access the tutorial via my cell phone. I can get to the link, but the pictures don't come up. So I had a stab at it by trying to remember what I saw earlier in the day. (no, I don't read patterns. I too lazy to follow directions and I have this thing about breaking rules. :) )

I'm not much of a perfect circle cutter type of person. After I sliced off the sleeves and the collar and band, I folded the back fabric and cut what I thought was a good enough circle (it looked more like a rounded square). Then I went a sewing away. I ended up with an *ok* funky but not cute hat. I wore it.


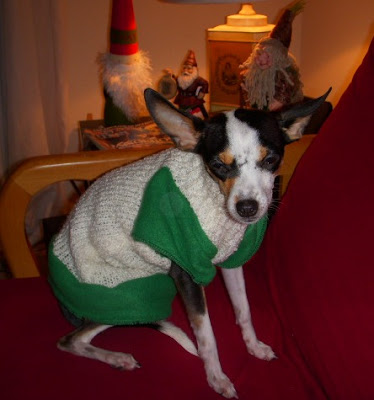
I conquered the hat and wanted to do something else with the left over fabric. So I made a doggie sweater for our sweet little rat terrier we call, Girl. I used the sleeves of the sweater for this idea. Luckily, Girl is teeny-tiny and fit the sleeve perfectly. The black one is kinda sorta a camouflage sweater. Other than the red strip of fleece at the bottom, it blends well with the color of her fur.

Yes, she’s not happy wearing it, but it DOES keep her warm so she’s dealing.
And no I’m not taking orders… :P